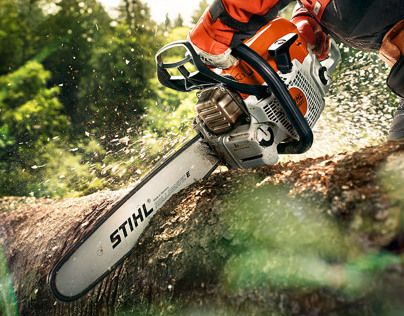
A sharp chainsaw chain is the single most important factor for efficient, safe, and enjoyable cutting. A dull chain forces you to push harder, leading to increased fatigue, slower work, excessive fuel consumption (for gas saws), and a higher risk of dangerous kickback. While professional sharpening services are available, learning to sharpen your chainsaw blade at home is a valuable skill that saves time and money, ensuring your saw is always ready for optimal performance.
1. Why Sharpening is Crucial
- Safety: A sharp chain cuts cleanly and efficiently, reducing the likelihood of kickback, binding, and loss of control. A dull chain tends to “bounce” off the wood, increasing the risk of accidents.
- Efficiency: A sharp chain slices through wood with minimal effort, allowing you to complete tasks faster and with less strain on both yourself and the chainsaw’s engine/motor.
- Longevity: Proper sharpening reduces wear and tear on the chain, guide bar, and sprocket, extending the lifespan of your chainsaw components.
- Quality of Cut: A sharp chain produces clean, consistent wood chips; a dull chain produces fine sawdust and a ragged cut.
2. When to Sharpen Your Chain
You should sharpen your chain:
- After every few hours of cutting: Even if the chain doesn’t feel completely dull, a light touch-up will maintain peak performance.
- If you hit dirt, rocks, or metal: Even a brief contact can dull or damage the cutters instantly. Stop immediately and inspect the chain.
- If the saw struggles to cut: If you have to push hard, or the saw isn’t pulling itself into the wood.
- If the sawdust looks fine and powdery: A sharp chain produces distinct wood chips.
- If the saw cuts crooked: This often indicates unevenly sharpened cutters on one side.
3. Essential Tools for Home Sharpening
Before you begin, gather the right tools:
- Round File: The most common tool. You must use the correct diameter for your chain’s pitch (e.g., 5/32″, 3/16″, 7/32″). Check your chainsaw manual or the chain’s packaging for the correct size.
- File Guide/Holder: This tool clips onto the chain and holds the round file at the correct angle and depth, ensuring consistency. Highly recommended for beginners.
- Flat File: Used for filing down the depth gauges (also called rakers).
- Depth Gauge Tool: A small metal plate with a slot that helps you check and set the correct height of the depth gauges.
- Vise or Stump Vise: To securely hold the guide bar while sharpening, preventing movement.
- Work Gloves: For protection.
- Chain Oil/Bar & Chain Oil: To lubricate the chain after sharpening.
4. The Step-by-Step Sharpening Process
- Secure the Chainsaw: Place the chainsaw securely in a vise or stump vise. Engage the chain brake.
- Identify the Starting Tooth: Find a cutter that needs sharpening (usually the most worn one) or simply start at a distinct point, like the cutter closest to the chain brake. Mark it with a marker.
- Determine Filing Direction: Chainsaw chains have two types of cutters: left-hand and right-hand. You will sharpen all cutters facing one direction, then flip the saw or move to the other side to sharpen the cutters facing the opposite direction.
- Position the File Guide: Place the file guide over the cutter you’re sharpening, ensuring the correct angle marks align with the chain. The file should be held at the correct angle (usually 25-30 degrees relative to the guide bar, and slightly angled upwards).
- File the Cutter: Using firm, even strokes, push the round file away from you through the cutter. Lift the file on the return stroke. Apply consistent pressure. Count the strokes (e.g., 3-5 strokes) and apply the same number of strokes to every cutter of that type to ensure even sharpening. You’ll see metal shavings as you work.
- Move to the Next Cutter: Advance the chain to the next cutter of the same type (e.g., all left-facing cutters). Repeat the filing process.
- File All Cutters of One Type: Continue until all cutters facing that direction are sharpened.
- Flip the Saw/Move Position: Once all cutters of one type are done, either flip the chainsaw in the vise or move to the other side to sharpen the remaining cutters (those facing the opposite direction).
- Check and File Depth Gauges (Rakers): After sharpening all cutters, use the depth gauge tool and flat file. Place the depth gauge tool over a cutter. If the depth gauge (the small hump in front of the cutter) protrudes above the slot in the tool, file it down with the flat file until it’s flush. Do this for every depth gauge. This ensures the cutters can properly bite into the wood.
- Lubricate and Test: Once all cutters and depth gauges are sharpened, apply some fresh bar and chain oil to the chain. Spin the chain by hand to distribute the oil. Test the saw on a piece of wood. It should cut smoothly and produce consistent chips.
Conclusion
Sharpening your chainsaw blade at home is a fundamental skill that significantly enhances your chainsaw’s performance, extends its life, and most importantly, improves safety. By using the correct tools, understanding the angles, and practicing regularly, you can keep your chainsaw in top cutting condition, making your outdoor tasks much more efficient and enjoyable.


